Golden Rose Guide: Understanding a Paper Pattern
- Sep 20, 2025
- 3 min read
A sewing pattern is more than just paper — it’s your garment’s blueprint. Learning to read it fluently will save you time, fabric, and frustration, and give you the confidence to adapt and personalise your makes. This guide walks you through every element, from the envelope to the final stitch.
1. The Pattern Envelope — Your First Clues
Front of the Envelope
Pattern number – for reordering or finding tutorials.
Garment illustrations/photos – show style variations (“views”).
Size range – patterns are multi‑sized.
Skill rating – Very Easy, Easy, Fast‑to‑Sew, Average, Advanced.
💡 Golden Rose Tip: The skill rating is a guide, not a rule. If you love the design, you can tackle it — just allow more time and practise any new techniques first.

Back of the Envelope
Here you’ll find the technical essentials:
Section | What It Tells You | Why It Matters |
Body measurements | Bust, waist, hip, back waist length | Choose the correct size |
Garment description | Fit (close‑fitting, semi‑fitted, loose), lining, special features | Helps with fabric choice & fit expectations |
Suggested fabrics | Fibre types & weights | Ensures intended drape & structure |
Fabric requirements | Amount needed for each view, size, and fabric width | Avoids under‑ or over‑buying |
Notions | Zips, buttons, interfacing, elastic | Gather everything before starting |
Finished garment measurements | Actual bust/waist/hip after sewing | Reveals ease and fit style |
💡 Golden Rose Tip: Ease = Finished Garment Measurement – Your Body Measurement.Close fit: as little as 1.2 cm (½″) ease. Loose fit: up to 20 cm (8″).
2. Sizing — Choosing the Correct Size
Taking Your Measurements
Measure:
Bust/chest – fullest part
Waist – natural waistline
Hip – fullest part of hips/seat
If you fall between sizes, choose the size for your largest measurement.
💡 Golden Rose Tip: Sewing pattern sizes do not match ready‑to‑wear clothing sizes. Always check the size chart before buying.
Sizing Chart vs. Fitted Measurements
Sizing chart – standardised body measurements for the pattern brand.
Fitted measurements – actual garment measurements once sewn.
The difference between the two = ease.
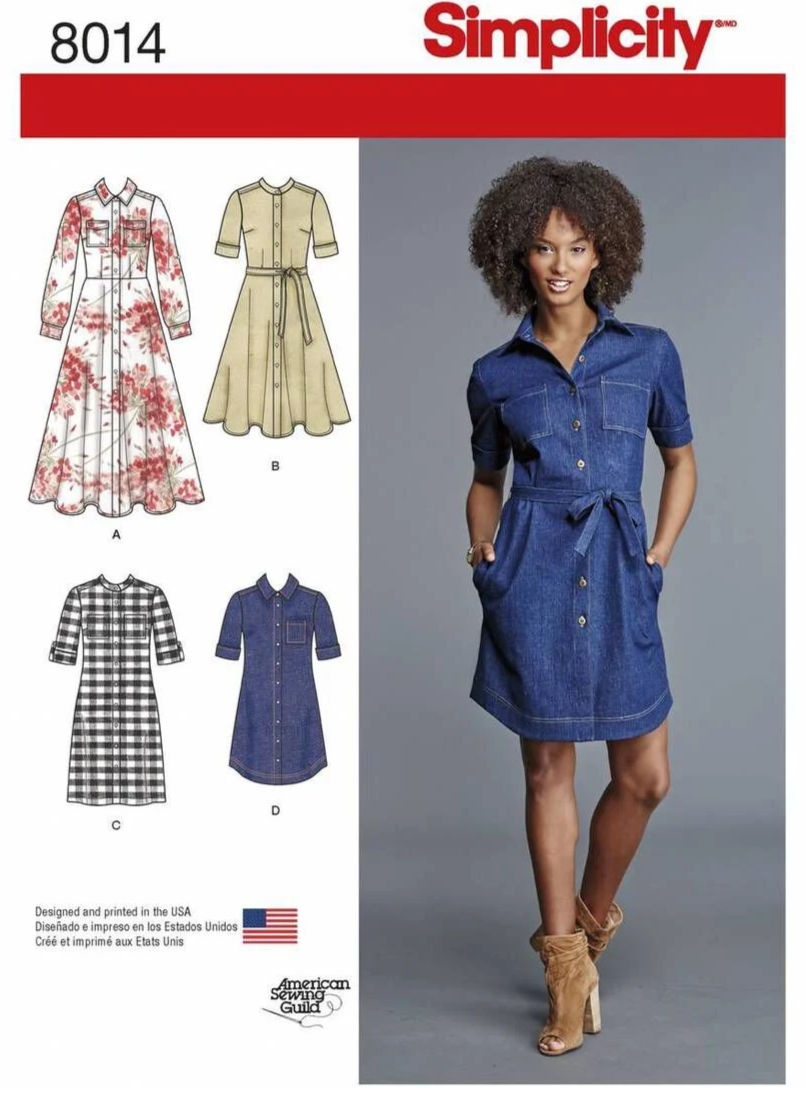
Example: Simplicity 8014 shows bust measurements in inches/cm for different regions, plus fitted garment bust and back length for each style.
Blending Sizes
If your measurements span multiple sizes:
Grade between sizes at bust, waist, and hip only if needed.
Looser garments with lots of positive ease may not require blending.
Use bust/waist/hip notches as start/stop points for grading.
Ensure matching adjustments on all joining pieces (bodice/skirt, front/back, facings).
3. Recommended Fabrics
Listed on the envelope to guide drape and fit.
May warn against unsuitable fabrics (e.g., stripes, one‑way prints).
Fabric choice affects the garment’s final look and feel.
4. Fabric Requirements
Given in yards (45″/60″ widths) and metres (115 cm/150 cm widths).
Extra fabric may be needed for matching stripes, plaids, or nap.
Find your view and fabric width on the chart, then match to your size.
5. Notions
Thread, buttons, zips, elastic, interfacing, trims.
Listed so you can gather everything before starting.
6. The Pattern Tissue — Symbols & Markings
Pattern pieces use minimal words and rely on symbols, which vary by designer.
Marking | Meaning | Use | |
 | Size lines | Cutting lines for each size | Follow your chosen size |
 | Centre Front/Back | Alignment reference | For button stands, symmetry |
 | Notches | Matching points | Join pieces accurately |
 | Grainlines | Align with fabric grain | Prevents distortion |
 | Foldlines | Place on fabric fold | Creates mirrored pieces |
 | Cutting line | Where to cut | Often dotted/solid with scissors icon |
 | Adjustment lines | Shorten/lengthen points | Alter length proportionally |
 | Darts | Shaping | Stitch along marked lines |
 | Buttonholes/Button | Placement | Keep closures functional |
 | Zipper mark | Zip placement | Guides insertion |
 | Stitching lines | Where to sew | Often dashed |
 | Shapes (dots, crosses) | Match points/design features | Accuracy in assembly |
💡 Golden Rose Tip: Cut notches outward to preserve seam allowance flexibility.
7. Choosing Your Own Pattern
Match figure type (teen, misses, petite, women’s) to pattern brand.
For garments worn on the upper body: choose by bust size.
For lower body garments: choose by waist size (or hip if proportionally larger).
Many skirts allow hip variation due to fullness.
Always consider making a toile to test fit.
8. Preparing to Sew
Transfer all markings before removing tissue.
Keep tissue pieces with cut fabric.
Organise pieces in construction order.
Double‑check notions and interfacing.
Final Thought: A paper pattern is your garment’s story before it’s sewn. The more fluently you can read it, the more confidently you can adapt, fit, and personalise your makes. With this guide, you have both the overview and the detail to make every project a success.
Happy Sewing!!!

Comments